BumQ

วันอังคารที่ 14 กุมภาพันธ์ พ.ศ. 2555

ติดตั้ง OpenERP 6.03 All in One for Windows

วิธีการติดตั้ง OpenERP All-In-One 6.03 บน Windows จะเหมือนกันกับเวอร์ชั่นที่ผ่านๆมาครับ
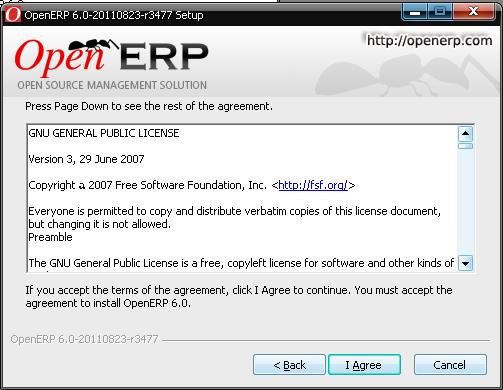
 ก่อนอื่นไปดาวน์โหลดโปรแกรมมาจากเว็บของ www.openerp.com มาก่อนครับ เมื่อได้แล้วทำการติดตั้งเลย กด Next ไปเรื่อยครับ ไม่ต้องเปลี่ยนแปลงค่าใดๆ


 โปรแกรมจะตั้ง port 5432 มาให้ โดยใช้ username เป็น openpg และ Password เป็น openpg สามารถเปลี่ยนค่าได้ครับ หรือใช้ค่าดีฟอลต์ ไปโลดครับ
 หากต้องการเปลี่ยนตำแหน่งที่เก็บโปรแกรมก็ทำได้ครับ
 ตอนนี้โปรแกรมติดตั้งจะทำการแตกไฟล์ติดตั้งย่อยๆออกมาก่อน แล้วค่อยติดตั้งโปรแกรมตามค่าที่เรากำหนดให้ครับ รอประมาณไม่เกินสามนาทีก็เสร็จแล้ว


กด Finished ก็เรียบร้อยเลยครับ

วันพฤหัสบดีที่ 12 มกราคม พ.ศ. 2555

OpenERP TV Tutorial

Part I
1  Create a new database
      minimal profile
         
2 Log into openerp GTK with the db created above.        
3  install module base_contact

4 Create new Menu

5 Menu:  Partners/contacts (Click on contacts --> from menu Form choose 
         Switch to list/form --> 
                 now click new buttom
                 fill-in the field as follow
         Menu: School Management
         Sequence: 10            
                 Parent Menu:
                 Action: ir.action.act_window - Customers Partners
                 ( click on the folder to find Customers Partners)
                 then Save.
                 
                 Click new buttom
                 Complete Name: ( the system will fill the name )
                 Menu: Configuration
         Sequence: 10            
                 Parent Menu: School Management
                 Action: ir.action.act_window - Customers Partners
                 save.
Go back to Menu and reload and School Management/Configuration should be there. 
Cheers!

Let open the openERP Web to the database we are working on.
We are going to customize the contacts.
>From Main Menu select Partners/contacts (click on contact and change into Form 
>View, on the bottom left hover over [CUSTOMISE] and select MANAGE VIEWS.

>From there the Manage Views(res.partner.contact) will open 
choose edit because (res.partner.contact.form is the default). 

The View Editor 134 - res.partner.contact become visible.
The page that come up is XML code. Find the line that said
<field> and click on the + sign to the right (on the same line).
when the + sign is click that bring the properties window select new field and 
fill in the data 
Name: x_student 
Field Label: Is a student 
Field Type: boolean 
Save, Update,Update that bring you back to the view editor.

Repeat the same process for teacher but click the + sign on the line 
<field>.        
the data to be enter is  
Name: x_teacher 
Field Label: Is a teacher 
Field Type: boolean
Save, Update,Update
 
them close the view editor. (Review your work)
Partner/contacts  click Form View
Now we can select contacts as being a student or teacher.

Let create a new student:
Main Menu -- Partners/contacts  click on the new buttom and create a sample 
student or teacher.

Creating a menu for teachers and students.
Main Menu -- Partners/Contacts (click on the icon that look like notebook and 
not on the word contacts to select it, them hit Switch (top right) a menu come 
up.

we are going to Save the current Menu, click on Save
them on Duplicate.
Now enter your data to create the menu
 
Menu: Students 
Parent Menu: School Management( click on the search buttom to find it)
Save & Edit
Let change the action, click on the search icon on the Action line
The Search Open Window come up, click on New and enter the following data
  
Action Name: Students
Object: res.partner.contact

Save ---> Save ---> Duplicate (we are going to do the same for teacher)

Menu: Teachers
Parent Menu: School Management  
Save & Edit

action ir.action.act.window - contacts    Search --> New
enter the following data

Action Name: Teachers
Object: res.partner.contact
Save
Save
Go back to Main Menu --> School Management (Configuration,Students,Teachers)
take a break, the end of part I.

OpenERP Custom Sample Module Development – OpenERP Quick Start Guide

Introduction

This article will explain the basic steps involved in developing custom OpenERP modules. It is a “Hello World” kind of guideline, therefore you won’t be able to find out all the theories behind OpenObject platform here. Instead you will get all the necessary information to get started with.
Sample module given here is fully functional and tested on OpenERP version 6.0-RC2 (with Web Client on Chrome browser). You will be able to download the complete source code at the end of this article.

Module Description

The sample module we are going to develop is a simple Notebook application. It helps to take down notes and contains just three fields namely “Title”, “Note” and “Date” in its data model.

Module Structure

An OpenERP module consists of some basic elements as explained below. Note that what is explained here is only the basic files required and structure will be more complex in real world applications.
  • module_name.py – contains the application logic and database table structure definition.
  • __init__.py – init script will load the application’s main python-module and related in application initialization.
  • view_name.xml – contains the application interface definition and menu structure.
  • __openerp__.py – is the module descriptor file. In previous versions of OpenERP this was known as “__terp__.py”

File Contents

Even though there is no specific order, I am going to start with the main python class (module) of our OpenERP module. This will handle the core functionality of the module and also will generate the database table to store related data.

[ notebook.py ]

[python]
from osv import fields, osv
import time
class notebook(osv.osv):
_name = "notebook"
_description = "Simple Notebook"
_columns = {
‘title’ : fields.char(‘Title’, size=30, required=True),
‘note’ : fields.text(‘Note’),
‘note_date’ : fields.date(‘Date’),
}
notebook()
[/python]
Next we import the python module we created in application initialization script.

[ __init__.py ]

[python]
import notebook
[/python]
After that we define the view and menu structure of our module.

[ notebook_view.xml ]

[xml]
<?xml version="1.0" encoding="utf-8"?>
<openerp>
<data>
<record model="ir.ui.view" id="notebook_tree_view">
<field name="name">notebook.tree</field>
<field name="model">notebook</field>
<field name="type">tree</field>
<field name="arch" type="xml">
<tree string="Notebook">
<field name="title"/>
<field name="note"/>
<field name="note_date"/>
</tree>
</field>
</record>
<record model="ir.ui.view" id="notebook_form_view">
<field name="name">notebook.form</field>
<field name="model">notebook</field>
<field name="type">form</field>
<field name="arch" type="xml">
<form string="Notebook">
<field name="title"/>
<field name="note"/>
<field name="note_date"/>
</form>
</field>
</record>
<record model="ir.actions.act_window" id="action_notebook_form">
<field name="name">notebook</field>
<field name="res_model">notebook</field>
</record>
<menuitem name="Notebook" icon="terp-project" id="notebook_menu"/>
<menuitem name="Notes" parent="notebook_menu" id="notebook_menu_mainform" action="action_notebook_form"/>
</data>
</openerp>
[/xml]
Finally create the application descriptor as follows.

[ __openerp__.py ]

[python]
{
"name" : "notebook",
"version" : "0.1",
"author" : "Keerthi Bandara @ iBCScorp",
"website" : "http://www.ibcscorp.com/",
"category" : "Generic Modules/Others",
"depends" : ["base"],
"description" : "Simple demo module",
"init_xml" : ["notebook_view.xml"],
"demo_xml" : [],
"update_xml" : [],
"active": False,
"installable": True
}
[/python]

Packaging and Installing New Module

To prepare your module for installation, you may simply compress the module directory into a zip archive (e.g. notebook.zip).
Once your module archive is ready, you can continue the installation by following the given path below.
1. Login to OpenERP admin view and open “Import Module” screen under “Modules” section in “Administration” area.  Select newly created module archive and click “Import Module” button.
Note: Sometimes on OpenERP V6 (RC2), the message ”Loading..” will be continuously displayed, even though your module is successfully imported. In that case simply close the message window and continue to next step.

2. After importing new module, it will appear under OpenERP “Modules” list. It can be easily located by Searching for the module name. Once you found the module, mark it for installation, then select the check box in front of the module and click “Apply Scheduled Upgrades” link.

Click on “Start update” to continue the installation.

Accessing Your Module

After installing your module successfully, it will appear on the home screen of your OpenERP client as follows.
The sample source code explained above is available here.

Conclusion

Motivation behind preparing this article was the difficulty I have faced in finding out a proper start up guide in custom OpenERP module development. Even official documentation appeared to be incomplete/inconsistent at the moment of writing this article.
Anyway there is a lot more to explore in OpenERP module development. As an OpenERP partner, iBCScorp is always willing to help you in your OpenERP implementation project. If you found this post useful just leave a comment and do not hesitate to contact us on any OpenERP related issue.